How To Make Wooden Coasters: DIY Wood Coasters Simplified
Put your creativity to the test by exploring how to make custom wooden coasters the DIY way. Explore a simple step-by-step process to create homemade coasters from wood and infuse any space with a touch of personalized charm and functional excellence. You will discover ideas for unique coaster styles and top tips on how to make them look great and perform flawlessly. Uncover the joy of getting hands-on with our guide to making coasters from wood.
Key Takeaways
- To make DIY wood coasters, you must choose the wooden base you want, apply your custom design to it, then seal it with a clear sealant.
- There are many wooden coaster ideas to choose from, all creating different aesthetics.
- It is possible to get customized wood coasters from professional suppliers at affordable prices.
- We create custom wooden coasters and can facilitate bulk orders with a professional finish on all products.
How To Make Wooden Coasters: Step-By-Step Guide
Making wooden coasters requires different skills depending on the type of design you want to make. You will need to choose a suitable base material for your goals and prepare it for applying the design. You will then need to apply your custom idea to it, using the necessary tools and materials to bring it to life. Finally, you must seal your DIY wood coaster so that it is ready to protect against spills, condensation, and other threats to your surfaces.
With the right tools and a little practice, you will be making high-quality pieces in no time. Follow this step-by-step process to make coasters from wood that will add a unique, personalized touch to any space and protect your surfaces effectively. Alternatively, you can upload your design to our service and leave the crafting to us.
Choosing A Material For Your Wood Coaster DIY Project
There are several woods available to you as base materials for DIY wood coasters. Each offers its own unique texture and finish, and will be slightly different for handling when you are making your coasters.
Popular materials include:
- Hardwoods: Maple, oak, and walnut are good options, providing a solid and resilient coaster base.
- Softwoods: Pine and cedar will provide a lighter feel and a more natural aesthetic.
- Plywood: These involve layers of wood veneer bonded together for a cost-effective and versatile coaster base.
- Bamboo: Though not actually wood, bamboo looks very similar to wood and provides a unique and eco-friendly solution.
Wood coaster bases can be purchased from craft stores in all of these materials. Prepare yours by gently sanding for a smooth texture, then wiping away debris. Apply a primer before adding paint if you want to have a background color for your coaster.
Decorating The Wood Coaster With Your Personalized Design Ideas
Once you have your wood coaster base prepared and readied, you can begin applying your design. There are many design ideas available to you, including:
- Applying a photograph
- Pyrography
- Decoupage
- Hand-painted designs
You will need to gather the appropriate tools and materials for your chosen design. Carefully apply it to the wood coaster base, making sure you don’t compromise the material in any way.
Take your time with this stage of the process. Your application of the original design is crucial to the eventual aesthetic of the coaster. Make sure you know what you want to achieve and have the necessary skills to bring it to life. If it is a skill that is new to you, consider practicing on other pieces of wood beforehand so that you are ready to get a good result in the real thing.
Sealing And Protecting Your DIY Wooden Coaster
After you have made your wood coaster idea on the coaster base, the final stage is to apply sealant. This is very important as it will protect the artwork and ensure your coaster is waterproof and ready to stand the test of time. To make wooden coasters waterproof, you will need to choose a clear sealant suitable for your project. Options include:
- Polyurethane
- Lacquer
- Epoxy resin
Before you begin applying the sealant, you should ensure that any paint or other materials in your design are completely dry. Once confirmed, use a fine-grit sandpaper over the coaster’s surface to create a smooth base for the sealant.
Apply the sealant according to the manufacturer instructions. Using a brush or cloth, create a thin, even layer all over the coaster’s surface, aiming for uniform coverage. The product instructions will tell you the required drying time, and bear in mind that you may need to apply more than one coat.
Hosting A DIY Coaster Crafting Party
Creative hobbies are incredibly popular in 2025, and hosting a coaster crafting session with friends or family could be a fun and engaging group activity. Consider planning a themed DIY wood coaster night - this can be a great activity for birthdays, holidays, or team-building events.
Prepare stations for different design methods, such as:
- Pyrography
- Decoupage
- Painting
Offer sealed coaster bases for safety and time efficiency. Not only does this foster creativity - it also ensures everyone leaves with a handmade keepsake. This is an excellent way to share skills and make lasting memories.
Want to skip the DIY process of creating wooden coasters?
Work with us to design personalized wooden coasters and let us handle the crafting process. We guarantee premium results at competitive prices with bulk options available.
DIY Wood Coaster Design Ideas
There are many DIY coaster design ideas that are applicable to wood. We will look at a few possible options here, but there are many more to explore as you look deeper into how to make DIY wooden coasters.
Wood is a versatile material, and there are different types of wood that offer different properties and aesthetic qualities. Consider your options based on the surroundings you intend to use your coasters in and the desired aesthetic with your products. Let’s take a look at some popular DIY wood coaster ideas and get some insight into how you could use them in your homemade wooden coasters project.
Decoupage
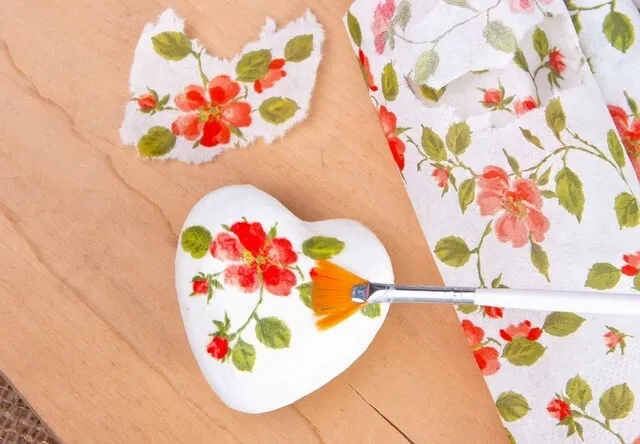
Decoupage is a creative, versatile technique for creating homemade coasters from wood. It involves the application of decorative paper or fabric onto a surface, sealed with a transparent sealant.
Here is a simple guide to make a coaster from wood with a decoupage design:
- Gather your materials. You will need a wood coaster base, some decorative paper/fabric, decoupage glue, a paintbrush, and your chosen clear sealant.
- Prep the coaster. Sand the wood to get a smooth finish.
- Cut and arrange the paper/fabric. Experiment with placement to get the desired aesthetic.
- Apply the decoupage. A thin layer of decoupage glue is all you need, then carefully place the paper/fabric on top.
- Sealing. Apply additional layers of decoupage glue over the top to seal the coaster. Alternatively, use your chosen clear sealant, following manufacturer instructions.
Decoupage is a simple way to make a unique, creative design so that each DIY wood coaster is a visually-appealing piece.
Wood Burning (Pyrography)
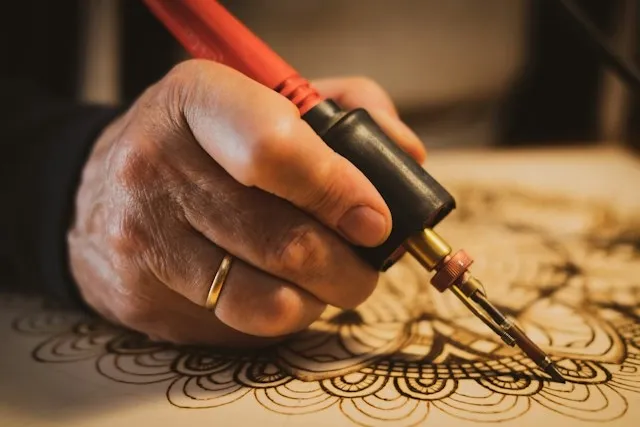
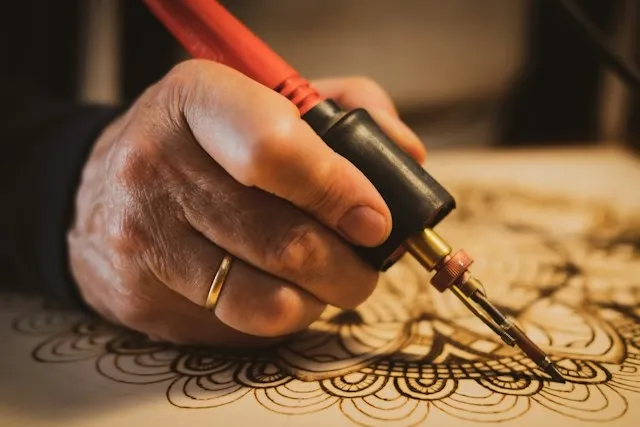
Pyrography is an intricate technique for creating detailed designs when making wooden coasters. Here’s a brief step-by-step to incorporate pyrography into your custom coaster crafting:
- Gather materials. You will need your wood coaster base, a pyrography tool with multiple tops, and a pencil for sketching your design.
- Prepare the coaster. It’s a good idea to sand the coaster to ensure the surface is smooth before you begin.
- Sketch your design. Use the pencil to lightly draw your design onto the coaster.
- Pyrography. Heat your pyrography tool then carefully trace over the pencil lines, burning the design into the wood.
- Fine details. Experiment with different tips to vary line thicknesses for an intricate aesthetic.
- Sealing. Complete your DIY wood coaster project by sealing it with a clear coat.
Pyrography can create visually captivating custom designs for your homemade wood coasters. You can even combine the technique with painting to add color into the mix.
Resin Inlay
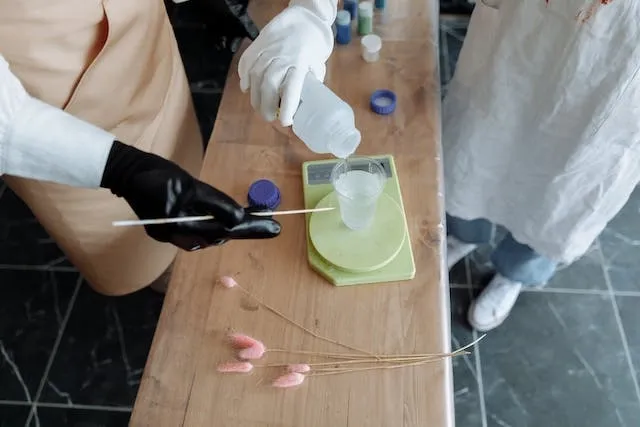
By using resin inlay techniques, you can add depth and a glossy finish when making wood coasters. Here’s a brief guide to this creative DIY coaster idea:
- Gather materials. You will need your wood coaster base, some clear epoxy resin, mixing cups and sticks, optional pigments or dyes, and some small items for the inlay.
- Prepare the coaster. Sand the surfaces to create a smooth base for the resin.
- Arrange the inlay. Whether you choose stones, shells, a photograph, or any other small items, arrange them in your desired pattern on the coaster.
- Mix the resin. Follow the product instructions to mix your epoxy resin. Add pigments or dyes if desired.
- Apply the resin. Pour the resin over the coaster to cover your inlay. Follow the product instructions for curing times.
With a resin inlay, you can create aesthetically appealing DIY wood coasters in your desired format.
Painting
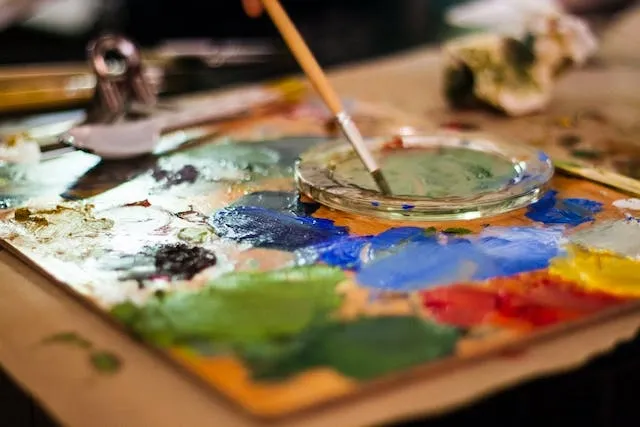
Hand painting is an expressive and versatile approach to making wooden coasters at home, with the potential to incorporate intricate designs and vibrant colors. Follow this simple guide to create elegant hand painted wooden coasters:
- Gather materials. You will need a wooden coaster base, some acrylic paints, paintbrushes of varying sizes, and a palette or other paint mixing surface.
- Prepare the coaster. You should sand the coaster gently to create a smooth painting surface.
- Plan your design. Use a pencil to sketch your desired design onto the coaster base.
- Apply paints. Carefully apply the acrylic paints using your brushes to layer colors and details as needed and bring your design to life.
- Drying. Allow the paint to dry completely before you move onto the next stage.
- Sealing. Seal the coaster with your chosen clear coat to protect the design and make the coaster waterproof.
There are endless possibilities when you use hand painting to make homemade wood coasters.
Materials Needed For Making DIY Wood Coasters
It’s important to remember what coasters are used for when thinking about how to make wooden coasters. Essentially, coasters perform a dual function: to contribute to the overall aesthetic in a space and to protect surfaces from damage relating to beverages.
When making DIY coasters from wood, you must ensure you gather the appropriate materials for your chosen design. This means getting the right:
- Base materials
- Decorating supplies
- Sealing supplies
In this section, we will take a more in-depth look at considerations relating to materials when making wood coasters at home.
Base Materials
Selecting the right base material for your wood coaster ideas is important for a successful DIY wood coaster project. Consider the following options:
- Hardwoods: These durable, resilient materials provide a solid base for your DIY wood coaster project. They are a good choice for intricate designs like pyrography or hand painting, and provide a high-quality finish.
- Softwoods: These are good materials for beginners to work with as they are lightweight. They offer a natural aesthetic and are compatible with most design types, but they may require a little extra protection against wear.
- Plywood: Versatile and budget-friendly, plywood is made from multiple layers of wood veneer. You can apply a number of design types to this material for a cost-effective solution.
- Bamboo: Creating custom bamboo coasters is an eco-friendly solution that can add visual interest to your DIY wood coaster design. While less versatile than some, it can still enable a modern, natural look.
Choosing the right base material ultimately comes down to your preferences and design goals.
Decorating Supplies
The decorating supplies you need will depend on the type of design you want to apply. It’s important to gather all these supplies and have them to hand before you begin your DIY wood coaster project. Here are some wood coaster ideas and the decorating supplies you need for them:
- Decoupage: For this project you will need some decorative paper/fabric, decoupage glue, and a paintbrush.
- Wood burning: To do this, you will need a pencil and a pyrography tool with multiple tips.
- Resin inlay: For this homemade wood coaster design, you will need your chosen inlay items and some clear epoxy resin, including the mixing apparatus.
- Hand painting: To hand paint onto wood, you will need acrylic paints, a range of paintbrushes, and a palette or other mixing surface.
Learn exactly what you need for your chosen design and get all the decorating supplies ready before starting your DIY wood coaster project.
Sealing Supplies
There are various approaches to sealing your DIY wood coasters, but it is important to do so. Sealing protects your design and makes the coaster waterproof and more durable. Here are some popular sealant choices:
- Polyurethane: You will need polyurethane sealant, fine-grit sandpaper, and a brush to apply.
- Lacquer: This requires a lacquer sealant, some sandpaper, and a spray gun or brush.
- Epoxy resin: This approach needs some clear epoxy resin, mixing cups and sticks, and an optional heat gun.
- Beeswax: You will need beeswax, mineral oil to blend it with, and a cloth.
Do some research to identify the best method of sealing your wooden coaster. Then make sure you purchase all the necessary materials and read the instructions fully before applying your sealant.
Choose a wood-adjacent coaster material for a modern look
With our custom bamboo coasters, you can personalize this sustainable material to create coasters that look great and protect your tabletops effectively for the long haul.
Get startedHow To Care For And Maintain Your Homemade Wooden Coasters
Once you have made your DIY wood coasters, you need to take care of them to ensure longevity and a lasting aesthetic appeal. The upkeep of homemade wood coasters is quite straightforward:
- Clean regularly with a damp cloth to remove dust and spills.
- Avoid extreme heat, direct sunlight, and prolonged exposure to moisture.
- Reapply sealant when necessary to ensure the wood stays protected.
- Use your coasters appropriately, ensuring all who use them are educated on responsible coaster usage.
By adhering to these best practices for maintenance, you will keep your DIY wood coasters looking and working their best.
Adding Magnetic Backing For Multi-Functional Use
A clever DIY trend for 2025 is to make wooden coasters that serve multiple purposes, including being fridge magnets or wall art. When you add magnetic strips or adhesive-backed neodymium magnets to the underside of your wooden coasters, you can display them on the fridge or other metal surfaces when not in use. This can also work for displaying them if they have a design worth showcasing.
To do this, you must ensure the surface is smooth and clean before you apply the magnets. Use a strong adhesive that is suitable for wood, such as E6000 or epoxy glue. Make sure you let it cure fully once applied.
This tip is especially useful if you have smaller coaster designs, and it can help to reduce drawer clutter while enhancing the visual appeal of your fridge.
Frequently Asked Questions About How To Make Custom Coasters
What Materials Are Suitable To Make DIY Wood Coasters?
There are various coaster base materials for DIY wood coaster projects, each offering different properties and aesthetics. Popular choices include walnut, pine, plywood, and bamboo.
How To Care For And Maintain Your DIY Wood Coasters
Maintaining your homemade wood coasters is quite straightforward. Clean them regularly, keep them away from extreme heat or moisture exposure, and reapply sealant when necessary.
How Do You Make A Wooden Coaster?
DIY wood coaster projects typically start with a premade coaster base. Once you have yours, you should decide on what type of design you want, then apply it using the necessary materials and use a clear sealant to finish.