DIY Resin Coasters Made Simple: How To Make Resin Coasters
Unleash your creativity by tapping into our latest blog post about DIY resin coasters. Discover how to make resin coasters with a variety of designs for glossy, personalized creations. We’ll walk you through a step-by-step process with insights that will enable you to achieve stunning results. Elevate your home decor by making resin coasters with stylish and functional designs. This is a new world of crafting potential where you will bring your visions to life as pieces of functional art.

Key Takeaways
- The process for DIY resin coasters involved preparing the silicone molds, mixing the resin, and pouring it into the molds along with your chosen decorative elements.
- You should always gather all the necessary supplies and prepare your workspace before starting a resin coaster making project.
- Epoxy resin is a popular and effective material for making DIY coasters, but it takes work, time, and precision to get a good outcome.
- You can sidestep all the complexity by ordering custom resin coasters from us.
Table of contents
-
A Step-by-Step Guide to DIY Epoxy Resin Coasters
-
Supplies You Need To Make Coasters With Resin
-
How To Prepare Your Workspace For Resin Coaster Making
-
What Kind Of Epoxy Resin Do You Use For DIY Coasters?
-
Is Epoxy Resin Good For Making Coasters?
-
Is Sealing Necessary When Making DIY Resin Coasters?
-
How Long Do Resin Coasters Take To Dry?
-
How Can I Thin Out The Epoxy Resin Mixture?
A Step-by-Step Guide to DIY Epoxy Resin Coasters
Here we will show you how to make coasters with resin by breaking the process down into its individual steps.
You will need:
- Silicone molds in the right shape for your coasters
- Epoxy resin mixture
- Cups and mixing apparatus
- Optional dyes and decorative elements
- An optional heat gun
There are many potential designs you can make with epoxy resin, and we will get into that later. But the basic process is always the same in resin coaster making. You mix the resin, add your chosen colors and decorative elements, then pour the resin into the silicone molds. It ends with removing bubbles from the mixtures then following manufacturer instructions for curing.
Let’s look at all those steps in more detail.

Cleaning And Preparing The DIY Resin Coaster Molds
It is important to clean and prep your silicone molds before proceeding with your DIY resin coasters project. The steps to do this are simple:
- Clean: Use warm, soapy water to wash your silicone molds in order to remove dust or residue. Rinse thoroughly and allow them to air dry.
- Degreasing: Apply rubbing alcohol or acetone to wipe the molds and remove any remaining grease or oils that may impact the resin.
- (Optional) Apply mold release:A mold release agent could be useful for the easy removal of the cured resin. If you choose to do this, follow the product instructions closely.
Cleaning and prepping your DIY resin coaster molds is fundamental in how to make a resin coaster. It creates a conducive environment for the resin to ensure optimal results as you move forward with your resin coaster making DIY project.
Mixing The Resin Perfectly
You will need to create the perfect resin mixture for a successful resin coaster DIY project. All products will come with detailed instructions, but follow these steps to get it right:
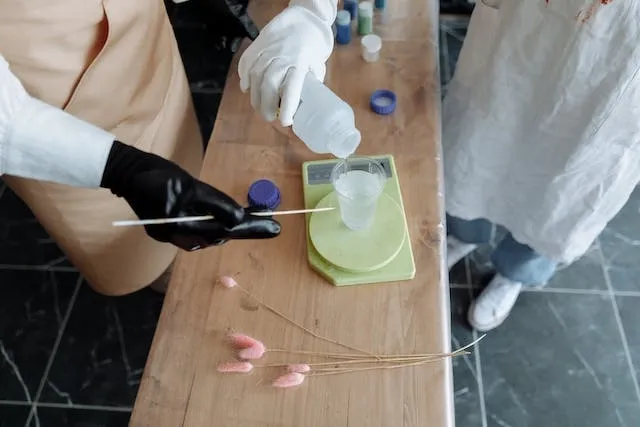
- Measure: You must measure equal parts of resin and hardener in graduated mixing cups.
- Mix: Combine the resin and hardener in a clean, disposable container. Stirring constantly is important to this.
- Avoid air bubbles: It will be helpful to your resin coaster making efforts if you stir slowly to minimize the risk of air bubbles. Let the mixture rest briefly so that air bubbles can rise.
- Temperature: Be aware that temperature impacts the quality and curing time of resin, so maintain a controlled environment.
Follow these steps carefully to achieve a well-blended resin mixture that can be used to bring your DIY coaster ideas to life.
Incorporating Colors And Decorative Elements
Many people like to add color to the resin as part of their DIY resin coaster design. You will need to have some specialist pigment prepared beforehand, and you can add it to the resin once you have created the mixture. Doing this can add a new dimension to the overall aesthetic - this is why we offer various color options when you order custom coasters from us. It can help you match the look of your coaster to the surrounding space.
Decorative elements are usually a key element of how to make resin coasters. Some of the most common selections include:
- Photographs
- Crystals
- Flowers
- Alcohol ink
- Glitter
If your vision involves decorative elements in your DIY resin coasters, you will need to suspend those elements within the resin. You start this by pouring a base layer of resin into the mold - see the next step for a detailed guide.
Adding The Resin To The Mold
Your silicone coaster mold should be placed on a flat surface. Carefully pour some of your mixed resin into it to create a base layer of about 5mm at the bottom. Once you have this, you can gently place your decorative elements on top. Create an aesthetically-pleasing arrangement if you are doing this step, as you cannot change it once you have covered everything in resin. Some people choose to skip this step altogether - no-one else can tell you how your custom personalized coasters should look.
Once you have arranged your decorative items, cover them completely with resin and fill the mold to the top. If glitter is your decorative item, you may want to apply it in stages to get an even distribution on the inside of the resulting DIY resin coaster. If you are not confident in getting this part right, you can always upload your design to us and let our expert craftsmen handle all the hard work.
Removing Bubbles To Achieve A Smooth Finish
Air bubbles can undermine the look of the final product when making resin coasters. It is best to try and remove air bubbles before you pour the resin, but it can be done afterward as well. Here are some common methods:
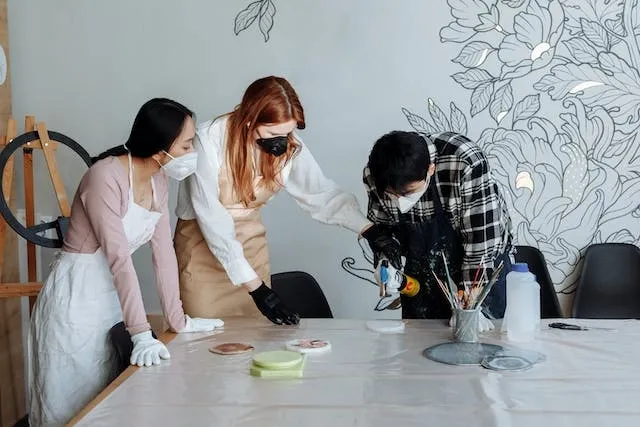
- Heat gun: Apply heat from the heat gun’s lowest setting along the resin’s surface in slow, sweeping motions to make the bubbles rise.
- Pin: Use a fine pin to poke at bubbles, making them rise to the surface.
- Vibration: Gently tap or vibrate the mold on a tabletop to shift the bubbles.
Be warned that a heat gun risks scorching the resin. Again, ordering from us takes all of this hassle off your hands. We always ensure a high-quality product when you place an order for custom drink coasters.
Curing
In resin coaster making, ‘curing’ is the process of allowing the resin to dry. How long resin coasters take to dry depends on the product. Follow the manufacturer instructions for curing and you should get the outcome you desire.
In most cases, the curing process takes between 24 and 72 hours. Read the instructions carefully for your epoxy resin and make sure you place the molds somewhere appropriate so that they can cure undisturbed.
Unmolding And Finishing The Coasters
Once the curing process is complete, you can carefully remove your DIY resin coasters from the silicone molds. You should confirm that the resin has fully hardened before doing this. Once confirmed, gently remove the coasters from the molds one-by-one with your hands, taking care not to damage the silicone molds or your new coasters.
Your coasters are now complete. The curing process may continue for several days afterwards, but it is ready to use with care. Making coasters with resin is a slow and difficult process that is very rewarding once complete. But if you want to avoid the investment of time and energy, design your customized coaster with us and our skilled craftsmen will do it for you using cutting-edge techniques.
Supplies You Need To Make Coasters With Resin
If you are learning how to make epoxy resin coasters, knowing the full list of supplies you will need is essential. Here are the things to look for to begin your project:
- A high-quality epoxy resin for crafting.
- A compatible hardener to mix with your resin.
- Graduated mixing cups and disposable stirring sticks to blend the mixture.
- Silicone molds in the appropriate shape for your designs.
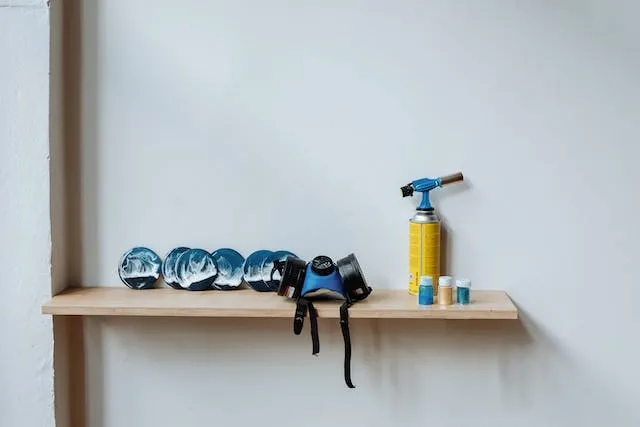
- Protective gear like rubber gloves, safety goggles, and a face mask.
- Colorants are an optional consideration if you want to add color to your resin.
- A heat gun may be useful for removing air bubbles from the resin mixture.
With these supplies to hand, you are ready to embark on your creative journey to make DIY resin coasters.

Creating Matching Coaster Sets With Holders
Another popular project in the DIY community is to craft a full set of resin coasters alongside a custom holder. You can purchase silicone holder molds or build a wooden holder base from scratch to complement your set.
When creating yours, consider creating a cohesive aesthetic by matching things like:
- Pigments
- Themes
- Decorative elements
When you create a unique holder alongside your personalized DIY resin coasters, you give your creation a polished, store-bought look that’s ideal for displaying or gifting.
Create the perfect coasters to match a beach vibe
Work with us to create custom beach resin coasters if you don’t fancy the DIY work. We can bring your designs to life to the highest standards.
How To Prepare Your Workspace For Resin Coaster Making
It’s important to prepare a suitable workspace for making coasters with resin. Follow these steps to create the ideal environment for your project:
- Ventilation: Work in a well-ventilated area or use a fan.
- Surfaces: You need a flat, stable surface,and it should be covered with a disposable tablecloth or plastic sheet to catch spills or drips.
- Protective gear: Use gloves, safety goggles, and a mask for your own safety.
- Supplies: Make sure you have all your supplies to hand and that they are well organized around you.
- Temperature: Keep the room temperature stable as much as possible.
- Leveling: Keep your work surface level at all times so that the resin is evenly distributed.
Meticulous preparation of your workspace gives you a greater chance of success with your DIY resin coaster project.
What Kind Of Epoxy Resin Do You Use For DIY Coasters?
The best epoxy resin for DIY resin coaster making is a clear, self-leveling, UV-resistant formula that is designed specifically for crafts. Look for the following qualities in your chosen epoxy resin:
- Clarity: The resin should dry in a clear appearance and resist yellowing over time.
- Self-leveling: With this quality in your resin, you won’t have to work so hard to achieve a smooth, even surface.
- UV resistance: Sunlight exposure can cause some epoxy resins to turn yellow or gradually degrade. UV-resistance prevents this.
- Low odor: A low-odor resin will help ensure your working environment is more comfortable.
There are various brands that offer epoxy resins that possess all of the above qualities. Take your time to make the right choice, as it will make a big difference to your results. Alternatively, work with us to get high-quality personalized resin coasters with none of the effort.
Looking to add your cherished photos to resin coasters?
We can create custom resin photo coasters based on your designs, taking on all the hard work to provide high-quality products for you.
Create your personalized coastersIs Epoxy Resin Good For Making Coasters?
When you consider the best materials for making coasters, epoxy resin definitely ranks highly. It offers a number of benefits that make it ideal for both professional and DIY coaster making:
- It is durable: When you make resin coasters, you get a durable, sturdy surface that easily withstands daily use.
- It has excellent clarity: The crystal clear finish of a DIY resin coaster makes it ideal for showcasing your design elements.
- It is versatile: The versatility of epoxy resin means you can easily choose the shape of your coaster, incorporate pigments, and add decorative elements to unleash your creativity.
- You get a smooth finish: Epoxy resin can have self-leveling properties, making it easy to achieve a smooth, even finish.
With such durability, clarity, and versatility, it is no surprise that people love to make resin coasters for their homes or places of business. They are among the most popular options for the custom coasters we sell.
Embedding Functional Items For Practical Use
One of the most creative trends in 2025 DIY resin coaster making is embedding practical items into the design. By doing this, you create coasters that are beautiful and may also serve interactive or multi-use purposes.
Things you could embed include:
- Small bottle openers
- NFC tags
- QR codes
To try this, make sure your chosen item is moisture-resistant and flat enough to avoid surface distortion. Test placement within the mold before pouring resin and secure the item with a thin base layer to hold it in position before filling to the top.
This idea makes for fantastic gifts or branded merchandise. Make a unique impression and make your coasters into essential everyday tools.
Is Sealing Necessary When Making DIY Resin Coasters?
When making custom personalized coasters, it is often recommended to apply a sealant as the final step to protect the finish and improve water-resistance. Many will advise you to add a clear, durable sealant like polyurethane or an epoxy resin topcoat to your DIY resin coasters for the following reasons:
- It provides an additional protective layer to shield against scratches, stains, and general wear.
- It boosts the coaster’s UV resistance, helping to prevent yellowing or gradual degradation.
- A sealant will help maintain the clarity of your resin coasters.
- You will probably improve the durability of the final product if you add a sealant as the final step of your resin coaster making project.
Overall, there are many benefits to sealing resin coasters after a DIY project to safeguard their visual appeal and longevity.
Personalized coasters with a similar aesthetic to resin
Our custom personalized glass coasters create a similar look to resin but with a more sophisticated appearance with your bespoke design included and outstanding surface protection.
How Long Do Resin Coasters Take To Dry?
There are various factors that influence how long it takes to dry a resin coaster. These include:
- The resin you use.
- The thickness of the resin layer.
- Environmental conditions.
Generally speaking, epoxy resins will be touch-dry within the first 24 hours. But full curing can take anywhere from 72 hours to a week or more.
The key is to follow the manufacturer instructions when curing your DIY resin coasters. Drying times can vary, and it may not be easy for you to control environmental factors like temperature, humidity, and ventilation. We can take this complex process off your hands if you order a custom personalized coaster from us. With our professional expertise and access to advanced tools, we will ensure your resin coasters are fully cured before shipping to you.

How Can I Thin Out The Epoxy Resin Mixture?
You should take great care if you are attempting to thin out a resin mixture during the process of how to make resin coasters. Altering the resin-to-hardener ratio can compromise the material’s ability to cure. If you really need to thin your epoxy resin, the following might work:
- Adding heat: Gently warming the resin can reduce its viscosity.
- Solvent additives: There are epoxy thinners for specific resins.
It is essential to consult the manufacturer guidelines before attempting to modify your epoxy resin. You must confirm compatibility or you could completely derail your resin coaster making project. Exercise great care to avoid compromising your resin - ideally, you will not attempt to thin out your resin mixture. If you mix it properly, it shouldn’t be necessary.
Want a different coaster material with a resin coating?
You can create custom cork coasters with us and add a high-quality resin coating for added protection and vibrant, personalized designs with bulk ordering available.
Learn more hereFrequently Asked Questions About DIY Resin Coasters
What Kind Of Epoxy Resin Is Best For Resin Coaster Making?
It’s important to choose resin that is designed for crafting. Useful properties include high clarity, self-leveling, and UV resistance to get the best DIY resin coasters.
Is Resin Good For Making DIY Coasters?
Yes it is! It is a versatile material that is easy to work with and creates durable, aesthetically-pleasing coasters. This is why it is a popular choice among our customers.
How Long Do Resin Coasters Take To Dry?
You should follow the manufacturer instructions to confirm this. Resin curing typically takes upwards of 72 hours, though it is usually touch-dry within 24 hours.