How To Make Geode Resin Coasters Step-By-Step For Stunning Diy Results
Geode resin coasters look like sliced stone, but a first pour often looks more like pilled soup. Colors bleed, bubbles rise, and the gold ring drifts off center. We’ve helped plenty of makers past that stage. In this guide, we explain how to make geode resin coasters step by step, from mixing to curing to agate-inspired designs.

Key Takeaways
- Follow a fixed order: prep and level the mold, mix small batches, pour thin layered rings. Follow the manufacturer’s full-cure time; this may range from about 72 hours to seven days.
- Temperature controls bubbles: Warm resin flows thin and releases air, while a cold garage pour traps bubbles and cures cloudy.
- Less is more with metallics: One or two gold lines read as agate; five read as glitter soup.
- We supply high quality custom coasters in various styles and materials, including agate-style and resin designs you can personalize on a budget.
Table of contents
-
How To Make Geode Resin Coasters?
-
Which Geode Resin Coaster Tutorial Should You Follow?
-
How Do You Prepare, Mix, And Pour Resin Correctly?
-
How Do You Create The Geode Effect With Resin?
-
How Do You Finish And Decorate Geode Resin Coasters?
-
Which Geode Resin Coaster Designs Should You Try?
-
What Common Mistakes Should You Avoid When Making Resin Geode Coasters?
-
How Do You Care For And Maintain Resin Geode Coasters?
-
How Can You Keep Resin Geode Coasters Looking Their Best?
How To Make Geode Resin Coasters?
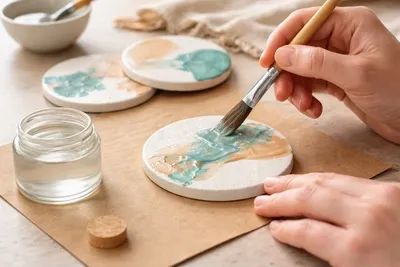
You make geode resin coasters by pouring tinted epoxy resin into a silicone mold in layered rings, then adding metallic accents once the piece cures. Epoxy resin is a two-part liquid plastic that hardens clear; a geode is a hollow rock lined with crystals, and the coaster borrows that banded look.
The project sits at a beginner-friendly skill level with one warning: it punishes rushing. Plan on 45 to 60 minutes of active work per batch, plus curing time measured in days.
Here is the short version of the process:
- Protect and level the workspace. Tape down a plastic sheet and check the mold with a small bubble level, because resin settles wherever gravity points.
- Plan the palette. Pick two or three main colors plus one metallic before you open any bottle.
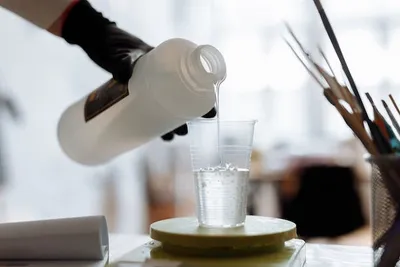
- Measure and mix. Combine resin and hardener at the exact label ratio and stir slowly for about 3 minutes, scraping the sides.
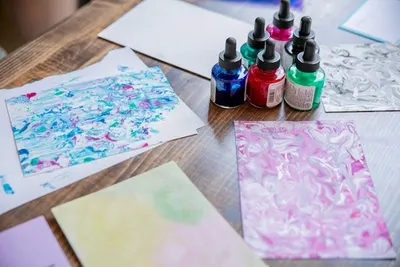
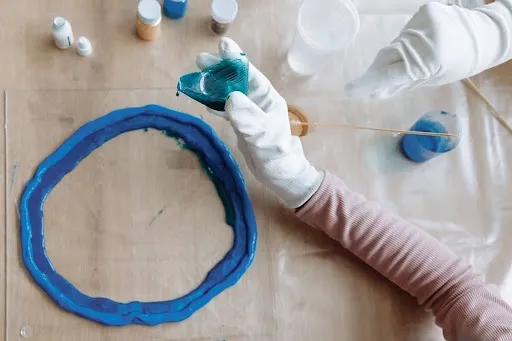
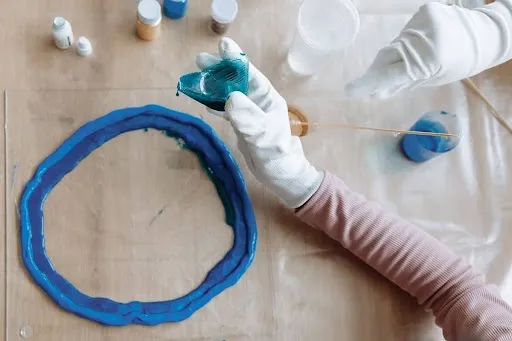
- Tint small cups. Split the mix into cups and color each one with mica powder or a few drops of alcohol ink.
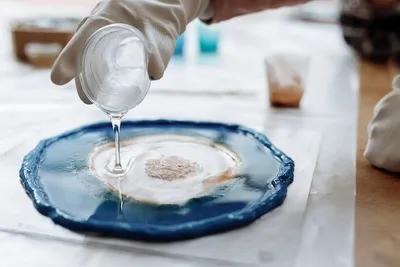
- Pour in rings. Work from the center outward, keeping each layer thin - around 1/8 inch.
- Clear the bubbles. Pass a heat gun or small torch briefly over the surface to pop what rises.
- Cure, demold, and finish. Wait at least 24 hours before demolding, then add the gold edging.
Each stage gets its own section below, and our resin coaster basics guide covers the plain version without the geode styling.
Which Geode Resin Coaster Tutorial Should You Follow?
Follow one structured geode coaster tutorial from start to finish - mixing methods from five different videos is how ratios and timings get crossed. A single source keeps its steps consistent with its own resin brand and cure schedule.
Written tutorials win for reference, since you can recheck a ratio mid-pour with sticky gloves. Video tutorials win for technique, because watching how fast someone drags a gold line teaches more than a paragraph can. We've found the pairing works well: read one, watch one, then pour.
Before attempting a full set, practice the core moves on a single small mold. One test coaster costs a little resin and saves a whole tray of disappointments.
Which Materials Create The Best Geode Resin Coasters?
Epoxy resin made for coasters or art gives the cleanest result - it self-levels and cures clear, which is exactly what the geode look needs. Deep-pour casting resins cure slower and suit thicker molds, so check the depth rating on the label.
| Material | What it does | Practical tip |
|---|---|---|
| Epoxy resin kit | Forms the clear body of the coaster | Match the label's mix ratio exactly, usually 1:1 or 2:1 by volume |
| Silicone coaster molds | Set the shape and surface shine | Glossy molds demold glossy; matte molds need polishing |
| Mica powders | Create shimmery opaque bands | Start with a pinch per cup and add slowly |
| Alcohol inks | Give translucent agate washes | One or two drops tint a whole cup |
| Gold leaf and flakes | Form the crystal-line accents | Place along ring borders with tweezers |
| Nitrile gloves and eye protection | Protect skin and eyes | Keep a spare pair within reach mid-pour |
Optional embellishments such as crushed glass or dried flowers belong at the rim or center, not everywhere at once.
University lab guidance rates nitrile over latex for chemical resistance, so skip the box of latex gloves. Spend on mid-grade or better resin too; bargain kits are where the soft cures we've seen usually start. Our resin epoxy comparison breaks down the trade-offs by project type.
Safety warning: Do not use a flame torch when alcohol ink or another solvent-based colorant is present. Alcohol ink is flammable. Use a heat gun on a low setting, keep it moving, and follow the resin and colorant manufacturers’ instructions.
Want the geode look without the resin mess?
Work with us to create custom resin coasters that carry your names, dates, or logo, finished in the colors your space already uses.
How Do You Prepare, Mix, And Pour Resin Correctly?
Correct pouring starts before the resin does: set up ventilation, measure by the label, and mix slower than feels natural. Open a window and run a fan blowing outward. NIOSH has cautioned since the 1970s that skin contact and vapors from uncured epoxy resins can trigger dermatitis, so gloves and airflow are part of the recipe.
Measure resin and hardener by volume in marked cups, never by eye. Stir for about 3 minutes, scraping the sides and bottom, until the mix pulls up clear with no streaks. Then stop.
Pour close to the mold in a thin, low stream - height whips air into resin. Our resin volume by mold depth guide helps you mix the right amount instead of guessing and wasting half a cup.
What Preparation Steps Help Prevent Resin Mistakes?
Three preparation habits prevent most resin mistakes: cover, level, and plan. Tape plastic sheeting over the table, check the mold with a bubble level, and line up your tinted cups in pouring order before anything gets sticky.
Temperature is the quiet variable here. Keep the room comfortably warm, around 70 to 75°F, and stand the closed bottles in warm tap water for 5 to 10 minutes so the resin flows thinner and releases bubbles more readily.
Wear nitrile gloves and long sleeves, since epoxy and acrylic resins sit on the list of industrial compounds linked to allergic dermatitis. Once the mold is filled, cover it with a clean box lid so dust doesn't land on the wet surface.
How Do You Create The Geode Effect With Resin?
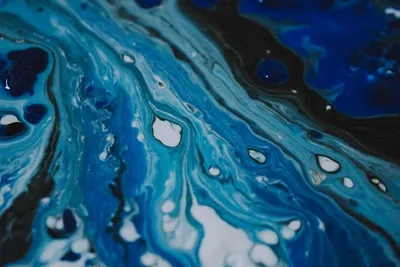
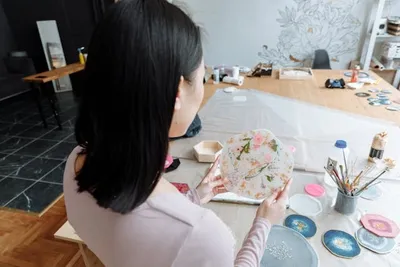
The geode effect comes from layered rings of color poured to imitate the banding of sliced stone. Pour the darkest or most saturated color as the outer ring, step inward through lighter shades, and save the most translucent mix for the center.
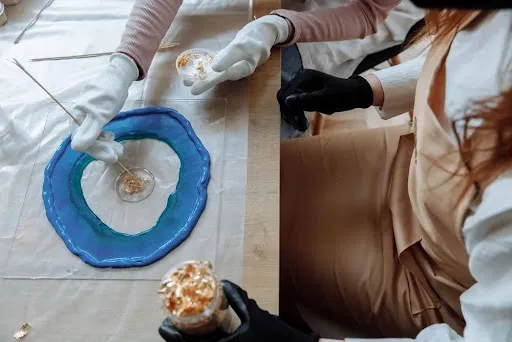
Blend where rings meet by dragging a toothpick once or twice through the seam - extra passes turn bands into mud. Lay a metallic line of gold mica or leaf along one or two borders while the resin is still tacky enough to hold it.
Let the piece cure untouched, then flex the mold gently from one side to release it. Work with us to create custom resin coasters in your palette with names or logos when you want this look for an event without weeks of pouring.
Which Techniques Make Resin Look Like A Natural Geode?
Copy nature's structure and the coaster reads as real stone. In actual geodes, crystals grow inward from the cavity walls, with banded chalcedony - the material we call agate - wrapping the rim. Translate that into resin: a textured, crystal-look center, then bands that grow calmer toward the outer edge.
Build color gradients by tinting three cups from one base color at different strengths. For the crystal center, seed clear resin with crushed glass or coarse glitter so light catches unevenly, the way real crystal points do.
Balance is the technique that matters most. Keep it to one gold vein and one glitter zone, and hold the rest of the surface quiet so the stone illusion survives.
Choose agate-style coasters for your home or venue
Our custom agate coasters bring the banded, crystal-look finish to your tables at competitive prices, with wholesale quantities for bars, weddings, and events.
Learn moreHow Do You Finish And Decorate Geode Resin Coasters?
Finishing turns a craft pour into a usable product, and it all happens after the cure. Give it the full window - most coaster epoxies firm up within 24 hours and keep hardening for about 72 - before you handle the piece roughly.
Gild the rim by brushing the edge with clear-drying adhesive and pressing on gold leaf, working in short sections. Then add rubber or cork feet underneath so the coaster grips the table and never scratches wood.
Hold each piece up to a window and inspect it in raking light. Small defects show now, which is far better than after gifting.
How Can You Achieve A Professional Finish On Resin Coasters?
A professional finish comes from wet sanding and a gloss pass, not luck. Sand drips and sharp edges starting at 400 grit, stepping up through 800 to 1000 or beyond, keeping the paper wet so dust stays down.
Sanding dulls the surface - that's normal and temporary. Restore the shine with a thin flood coat of fresh resin or a plastic-safe polishing compound buffed by hand.
Run a final quality check before first use: flat bottom, smooth rim, no tacky patches, feet attached straight. We've noticed the coasters that pass a fingertip sweep around the rim are the ones guests mistake for store-bought.
Need large quantities of custom coasters for an event?
Use our service to order custom coasters in bulk with generous wholesale discounts, so every table gets a matching set without weeks of pouring.
Which Geode Resin Coaster Designs Should You Try?
Start with combinations that already prove themselves on real tables: aqua and gold, black and gold, blush pink with white, and deep purple with silver. The same pour technique reads completely differently depending on the palette.
Color decides the mood. Blues and aquas skew coastal and calm, black and gold suits an upscale bar cart, while pink and purple pull toward vanity trays and bridal parties.
Work with us to bring a finished version of the look home - our custom agate coasters come in wholesale quantities for venues and events, with competitive prices on larger orders.
Which Color Combinations Create Stunning Geode Resin Coasters?
Green with a gold vein suits earthy, plant-heavy rooms, and aqua with gold is the classic beach-house pairing that photographs well on light wood. Black and gold handles bar carts and offices; pink or purple sets lean bridal shower; an all-glitter face fits party sets where subtlety isn't the point.
Depth comes from layering pigments, not from adding more colors. Pour a translucent wash, let it settle briefly, then pour a denser band of the same color family over it.
Match the palette to the room where the set will live. Pull the accent shade from a rug or a backsplash tile, and the coasters look planned rather than crafted.
What Common Mistakes Should You Avoid When Making Resin Geode Coasters?
The mistakes that ruin resin geode coasters cluster in four places: measuring, temperature, impatience, and overload. Eyeballed ratios cure sticky, oversized batches overheat as the reaction feeds itself, cold rooms trap bubbles, and early demolding leaves fingerprints in a surface that never fully hardens.
Color bleeding happens when rings are poured too full and too wet. Pour thinner layers and let each ring settle for a minute before its neighbor arrives.
Even careful makers lose a coaster now and then to a stray hair or a bubble that surfaces overnight. Mix a small margin of extra resin and treat a spare mold as insurance.
Use the quick quiz below to diagnose your own pour:
How Can You Improve Your Resin Art Results?
Improve fastest by shrinking the project. Pour single test coasters or small trinket molds before committing a full set's worth of resin, since small pours cost little and expose your habits quickly.
Keep a pour log with the date, room temperature, brand, ratio, colors, and result. After five entries, the pattern usually points at one fixable variable instead of vague bad luck.
Treat the first coaster of any new design as a draft. Adjust the palette or the gold placement while the stakes are low, then pour the remaining set in a single session.
Print any design onto your chosen coaster material
We print names, dates, logos, and full artwork onto many coaster materials, and you see a free proof before you pay for the order.
Get startedHow Do You Care For And Maintain Resin Geode Coasters?
Clean resin geode coasters with warm water and mild dish soap on a soft cloth - no abrasive pads and no long soaking. Dry each piece before it goes back on the table.
Keep finished sets away from direct sunlight. A 2024 study of cured epoxy found that UV exposure drives yellowing and darkening, with most of the color change landing within the first 100 hours of exposure. A sunny windowsill is the wrong home for resin.
Heat is the other honest limit. Standard craft epoxy softens under high heat, so treat these as coasters for cold and warm drinks, never as trivets for hot pans. Store spares flat with felt or paper between the faces.
How Can You Keep Resin Geode Coasters Looking Their Best?
Keep geode coasters looking new with a monthly wipe-down and a few habits that cost nothing. Lift rather than slide them across wood, and let felt feet stop grit from grinding the underside.
Restore fading gloss with a plastic-safe polish or a fresh skim coat of resin once fine scratches accumulate. Rotating display sets out of bright rooms each season also spreads UV exposure across the collection instead of one sacrificial coaster.
Work with us when you want matching backups or gifts to pair with a handmade set - our custom drink coasters come in many materials, with fast turnaround times and a free proof before you pay.
Frequently Asked Questions About How To Make Geode Resin Coasters
How Do You Make Geode Resin Coasters?
Mix epoxy resin at the label ratio, tint small cups, pour thin layered rings into a level silicone mold, add a metallic line, pop the bubbles, and let the piece cure fully before demolding.
What Materials Are Needed To Make Geode Resin Coasters?
You need epoxy resin and hardener, silicone coaster molds, mica powders or alcohol inks, gold leaf or flakes, mixing cups and stir sticks, nitrile gloves, and a level, dust-free spot for curing.